This article assumes you already have a MailChimp account and a subscriber list there (even if there is nobody in it yet). I’ll show how to make MailChimp send your subscribers email every time you write a new blog post. The information comes from my upcoming book, One-Hour Author Website.
If you haven’t already done so, first set up email addresses in your own domain — it can be a forwarding address rather than a mailbox on your server. This will let you use a “from” address in your domain, which is useful for people to whitelist your email in their spam blockers. You don’t have to use a real address (e.g. it could be noreply@yourdomain.com) but MailChimp requires you to have a working email address in the same domain as your “from” address.
You’ll also want to already have at least one blog post, for testing.
On the MailChimp website, go to Campaigns. Use the pulldown on the Create Campaign button to select RSS Campaign. This is the first of a series of screens to define what you want to send and to whom.
Supply the URL of your RSS feed, which is http://yourdomain/feed, so in our example, http://jonathanpopkesbean.com/feed. If you want your newsletter to not include every blog entry, see this article to learn how to construct a feed URL for subsets of your content, e.g. two specific categories of post.
Early weekday mornings is generally the best time to send notices.
Click the Next step link at the extreme bottom right.
Table of Contents
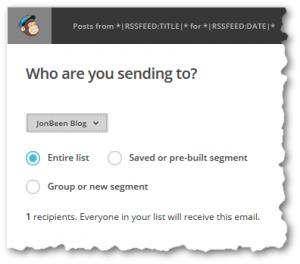
Select recipients
 Are you sending to everybody in your list? MailChimp offers the ability to let people specify which “groups” they want to join, if you set it up so and list the groups. Use this screen to select whether to send to everyone or just certain groups.
Click Next Screen
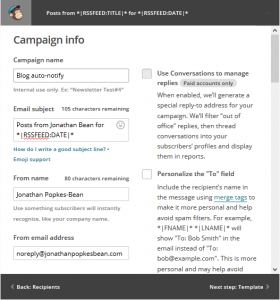
Campaign Info
The Campaign Info screen sets up the title of the campaign (for your reference), the subject line and sender of the email.
The subject line can include some special “merge tags” such as *|RSSFEED-DATE|* which are substituted with information (in this case the date) when the message is sent. There’s a link on this screen to a list of them, but the default subject is probably fine.
The “From Name” can be whatever you like.
The email address we entered here, “noreply@jonathanpopkesbean.com”, isn’t a real address, to avoid giving that address to subscribers. If MailChimp doesn’t already know you have a real address in the same domain, it’ll insist on confirming it at this time.
There are more options on this screen, but you can accept the defaults.
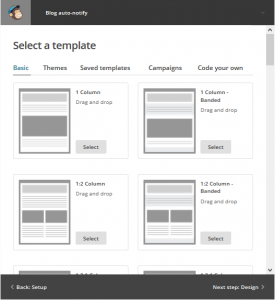
Next step is to select a “template” to control the layout of your email body.
Email body layout
 I think the simple “1 Column” template is fine, but suit yourself.
Next step lets you control the content of the message body.
Editing message body
Click the different areas of the email to edit their contents (or drag them around, or use the trash icon to delete them). Find the “RSS Items” icon on the left, and drag it to the point in the message where you want the list of new blog posts to appear.
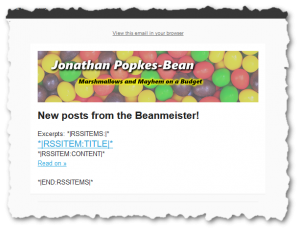
Similarly, to insert a picture or block of text, drag in other icons and customize their contents. Here’s what I ended up with for Jonathan’s subscribers:
 Like the subject line, there are various *|SPECIAL CODES|* you can use to insert variable text. The RSS Items section already has a default layout which you might be happy with, but if not you can click to edit it. For instance, if all the content on your site is by you, you maybe don’t need a byline on each entry.
Use the Preview and Test menu to see what the email will look like or to send yourself a test copy.
When you’re happy, click Save And Exit (top right), deal with any complaints MailChimp has about your memo, and you’re done. Your subscribers will automatically be notified of new blog entries on the days and times you specified.


